Thursday 5 January 2017

Installing and Configuring Oracle GoldenGate Studio 12c

Overview
Don't want to design or build Oracle GoldenGate architecture from Command line? Oracle GoldenGate Studio is the answer for you.
In 2015, Oracle has released a new tool which provides a Graphical User Interface (GUI) for designing and building Oracle GoldenGate Architecture called "Oracle GoldenGate Studio".

Installing Oracle GoldenGate Studio consists of following steps:

  1. Ensure Java JDK 1.8 is installed
  2. Install Oracle GoldenGate Studio
  3. Configure Oracle GoldenGate Studio repository
  4. Start and Connect to Oracle GoldenGate Studio 

In this artcile I will demonstrate how to Install and Configure Oracle GoldenGate Studio 12c in detail.

Environment

  • Oracle Enterprise Linux 6.8
  • Oracle RDBMS 11.2.0.4

Assumption
It is assumed that you have a database created which will be used as respository for OGG Studio


Downloading and Installing latest JDK

  • Get the current Java version installed.

[root@dm01db01 software]# java -version
java version "1.7.0_91"
Java(TM) SE Runtime Environment (build 1.7.0_91-b32)
Java HotSpot(TM) 64-Bit Server VM (build 24.91-b03, mixed mode)

Java JDK 1.7 and earlier versions doesn't work with the JAR files for Studio.
Java JDK 1.8 is required for GoldenGate Studio Installation.

  • To download the required JDK, navigate to the following URL and download the Java SE JDK:

http://www.oracle.com/technetwork/java/javase/downloads/index.html

  • Copy the downloaded rpm the server using WinScp and apply it.

[root@dm01db01 ]# cd /u01/app/oracle/software
[root@dm01db01 software]# ls -ltr
-rw-r--r-- 1 root   root     166040563 Jan  3 03:11 jdk-8u111-linux-x64.rpm

[root@dm01db01 software]# rpm -i jdk-8u111-linux-x64.rpm
Unpacking JAR files...
        tools.jar...
        plugin.jar...
        javaws.jar...
        deploy.jar...
        rt.jar...
        jsse.jar...
        charsets.jar...
        localedata.jar...

  • Verify the Java version 

[root@dm01db01 software]# java -version
java version "1.8.0_111"
Java(TM) SE Runtime Environment (build 1.8.0_111-b14)
Java HotSpot(TM) 64-Bit Server VM (build 25.111-b14, mixed mode)

Downloading Oracle GoldenGate Studio Software

  • Open a web browser and enter www.oracle.com in the address bar
  • This will bring you to the Oracle website home page
  • On this page hover on the download tab and click on "middleware"
  • Click GoldenGate
  • Accept the agreement and select the desired Oracle GoldenGate version for your platform.
Here I am downloading "fmw_12.2.1.2.6_oggstudio_Disk1_1of1.zip"
  • Sing in if prompted. The download will begin
  • Copy the zip file from your desktop to the server using WinScp
  • Drag and Drop the file from left to right in to a directory
Here I am copying the file to /u01/app/oracle/software location
  • File copy is in progress
  • Once the file transfer is completed, you will see the file on server as below
dm01db01-orcldb1 {/u01/app/oracle/software}:ls -ltr
-rw-r--r-- 1 oracle oinstall 2042373304 Jan  3 04:42 fmw_12.2.1.2.6_oggstudio_Disk1_1of1.zip

Steps to Install Oracle GoldenGate Studion

  • Make sure Java is set in your path properly.
dm01db01-orcldb1 {/home/oracle}:whereis java
java: /usr/bin/java
  • Here I am using Oracle user to install GoldenGate Studio software
[oracle@dm01db01 software]# java -version
java version "1.8.0_111"
Java(TM) SE Runtime Environment (build 1.8.0_111-b14)
Java HotSpot(TM) 64-Bit Server VM (build 25.111-b14, mixed mode)
  • Unzip the Oracle GoldenGate Studio software
dm01db01-orcldb1 {/u01/app/oracle/software}:unzip fmw_12.2.1.2.6_oggstudio_Disk1_1of1.zip
Archive:  fmw_12.2.1.2.6_oggstudio_Disk1_1of1.zip
  inflating: fmw_12.2.1.2.6_oggstudio.jar
  inflating: fmw_122126_readme.htm

dm01db01-orcldb1 {/u01/app/oracle/software}:ls -ltr
-rw-r--r-- 1 oracle oinstall       9032 Dec  5 16:49 fmw_122126_readme.htm
-r-xr-xr-x 1 oracle oinstall 2042431392 Dec  5 16:55 fmw_12.2.1.2.6_oggstudio.jar
-rw-r--r-- 1 oracle oinstall 2042373304 Jan  3 04:42 fmw_12.2.1.2.6_oggstudio_Disk1_1of1.zip
  • Start the x-window and set the DISPLAY variable to launch the installation window
dm01db01-orcldb1 {/u01/app/oracle/software}:export DISPLAY=10.10.193.2:0.0
  • Start the Oracle GoldenGate Studio software installation as follows:
dm01db01-orcldb1 {/u01/app/oracle/software}:java -jar fmw_12.2.1.2.6_oggstudio.jar
Launcher log file is /tmp/OraInstall2017-01-03_05-02-43AM/launcher2017-01-03_05-02-43AM.log.
Extracting the installer . . . . . . . . . . . . . . . . . . . . Done
Checking if CPU speed is above 300 MHz.   Actual 2527.001 MHz    Passed
Checking monitor: must be configured to display at least 256 colors.  Actual .   Passed
Checking swap space: must be greater than 512 MB.   Actual 16378 MB    Passed
Checking if this platform requires a 64-bit JVM.   Actual 64    Passed (64-bit not required)
Checking temp space: must be greater than 300 MB.   Actual 8262 MB    Passed

Preparing to launch the Oracle Universal Installer from /tmp/OraInstall2017-01-03_05-02-43AM
Log: /tmp/OraInstall2017-01-03_05-02-43AM/install2017-01-03_05-02-43AM.log
Logs successfully copied to /u01/app/oraInventory/logs.

  • The Installer wizard will be started
  • This is the first step out of 8 steps. Click Next
  • Select "Skip Auto Updates" and Click Next
  • Enter the Oracle GoldenGate Studio home for software installation
  • Select installation type as "Complete Install (Default)". Click Next
  • Prerequisite checks are performed. Click Next
  • The installation Summary is displayed
  • Now the Software Installation progress

  • Click Finish


Configure Oracle GoldenGate Studio repository

The Oracle GoldenGate Studio store entire replication design and deployment details in a database repository. You must install the repository schema on a certified database before using Oracle GoldenGate Studio. The repository is created using the Oracle Repository Creation Utility (RCU).

Make sure you created a database for storing the Oracle GoldenGate Studio objects before proceeding. Here I already have a database created by the name "orcldb" which I will be using as a repository.
  • Make sure the DISPLAY is set properly and Launch the Repository Creation Utility as follows:
dm01db01-orcldb1 {/u01/app/oracle/software}:cd /u01/app/oracle/product/oggstudio12c/oracle_common/bin/
dm01db01-orcldb1 {/u01/app/oracle/product/oggstudio12c/oracle_common/bin}:./rcu

        RCU Logfile: /tmp/RCU2017-01-03_07-10_453443440/logs/rcu.log

  • On the home page. Click next
  • Select "Create Repository" and "System Load and Product Load". Click Next
  • Enter the Oracle Database server details and Click next

  • Prerequisites checks are performed. Click ok

  •  Enter the "Create New Prefix". Click next


  • Prerequisite checks are performed. Click Ok


  •  Enter the password for all Schemas. Here I am select "Use same password for all schemas"


  •  Enter the Password for "Supervisor" user. Click Next

  • Click Next

  • Click ok

  • Click ok

  • On this page, tablespace mapping is displayed. Click next

  • System load in progress

  • Click Close to complete the RCU process


Start and Connect to Oracle GoldenGate Studio 

Now let's start the oggstudio and connect to the repository
Make sure the DISPLAY variable is set properly so the installer can be launced.

Execute the oggstudio utitilty to start the Oracle GoldenGate Studio 

dm01db01-orcldb1 {/u01/app/oracle/product/oggstudio12c/oggstudio/bin}:./oggstudio

Oracle GoldenGate Studio
Copyright (c) 1997, 2016, Oracle and/or its affiliates. All rights reserved.

Type the full pathname of a JDK installation (or Ctrl-C to quit), the path will be stored in /home/oracle/.oggstudio/12.2.1.2.0/product.conf
/usr/java/jdk1.8.0_111

Note: When you start the oggstudio for the first time, it will ask you for the jdk location and stores in it product.conf file. The furture start will not ask you for the jdk location again.

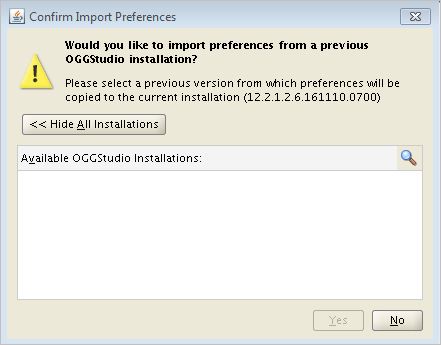
The Oracle GoldenGate Studio page appears as below
 For the first time it will ask you, if you would like to import preferences from previous installation. Click No.

  • The load will continue as follows


  • Click on the Plug symbol to connect to the repository database


  • Enter the Supervisor and it's password


  • Finally the oggstudio is started and you are connected the repository

Conclusion
In this article we have learned how to install and configure Oracle GoldenGate Studio 12c. The OGG Studio is very useful for the folks who can to design and build Oracle GoldenGate architecture using GUI interface.


Wednesday 4 January 2017

Rebuild Physical Standby Using RMAN Incremental Backup

Overview:
In my previous article I have shown you how to rebuild a physical standby database using RMAN full database backup. Please refer below link for same.

Rebuild Physical Standby using RMAN full backup  

Rolling forward a standby using RMAN full database backup can be time consuming and take several hours based on the size of the database. RMAN offers a flexibility to take the SCN based backup that can be used to incrementally roll forward a standby database. Using RMAN incremental backup to roll forward a standby database is the easiest and quickest way to sync a standby database.

Environment Details
Hostname
Primary server :–
lnx-nsm-prod01/ lnx-nsm-prod02

Standby Server :– 
lnx-nsm-dr01/ lnx-nsm-dr02

Operating system
Linux
Database Environment
NSMDB and NSMDR


  • Get the current SCN from standby database, we will use this SCN for the incremental backup from primary.
SQL> select current_scn from v$database;
  • Take a control file backup from NSMDB primary.
$ rman target /
RMAN> backup current controlfile for standby format '/backup/nsmdb/nsmdb_stby_ctl';
  • Create backup directory and take an incremental backup from primary, use the SCN from standby in step 1.
$ mkdir -p /backup/nsmdb/
$ rman target /
RMAN> run {
allocate channel c1 device  type disk format '/backup/nsmdb/nsmdb_%U';
allocate channel c2 device  type disk format '/backup/nsmdb/nsmdb_%U';
allocate channel c3 device  type disk format '/backup/nsmdb/nsmdb_%U';
allocate channel c4 device  type disk format '/backup/nsmdb/nsmdb_%U';
allocate channel c5 device  type disk format '/backup/nsmdb/nsmdb_%U';
allocate channel c6 device  type disk format '/backup/nsmdb/nsmdb_%U';
allocate channel c7 device  type disk format '/backup/nsmdb/nsmdb_%U';
allocate channel c8 device  type disk format '/backup/nsmdb/nsmdb_%U';
backup incremental from scn scn_from_step_1 database;
}
  • Get datafile file# and name from primary database, and spool output to text file f1.txt for reference.
SQL> select file#, name from v$datafile order by 1;
  • Copy the backup pieces to standby hosts in the same location.
$ mkdir -p  /backup/nsmdb
  • Stop mrp at the standby.
DGMGRL> edit database nsmdr set state=APPLY-OFF;
  • Get datafile file# and name from standby  database, and spool output to text file f2.txt for reference.
SQL> select file#, name from v$datafile order by 1;
  • Bring down standby database, all instances.
$ Srvctl stop database –d nsmdr
  • Start the standby database instance in nomount and restore the controlfile.
$ rman target /                            
RMAN> startup nomount
RMAN> restore standby controlfile from '/backup/nsmdb/nsmdr_stby_ctl';
  • Mount the standby database, stop MRP, catalog the backup pieces.
SQL> alter database mount standby database
SQL> ALTER DATABASE RECOVER MANAGED STANDBY DATABASE CANCEL;
$ rman target /
RMAN> sql 'alter database mount';
RMAN> catalog start with '/backup/nsmdb';
  • Catalog data files and switch the files to copy.
RMAN> catalog start with '+DATA/nsmdr/datafile';
RMAN> SWITCH DATABASE TO COPY;
  • Recover the standby database.
$ rman target /
RMAN> run {
allocate channel c1 device  type disk format '/backup/nsmdb/nsmdb_%U';
allocate channel c2 device  type disk format '/backup/nsmdb/nsmdb_%U';
allocate channel c3 device  type disk format '/backup/nsmdb/nsmdb_%U';
allocate channel c4 device  type disk format '/backup/nsmdb/nsmdb_%U';
allocate channel c5 device  type disk format '/backup/nsmdb/nsmdb_%U';
allocate channel c6 device  type disk format '/backup/nsmdb/nsmdb_%U';
allocate channel c7 device  type disk format '/backup/nsmdb/nsmdb_%U';
allocate channel c8 device  type disk format '/backup/nsmdb/nsmdb_%U';
recover database noredo;
}
  • Restart MRP and ensure that recovery is progressing.
DGMGRL> edit database nsmdr set state=APPLY-ON;

  • Monitoring
The below query can be used to monitor the progress of RMAN sessions performing backup/restore.

SQL> set lines 150
SQL> col MESSAGE for a100
SQL> col sid for 999999
SQL> col ELAPSED_SECONDS for 999999
SQL> col TIME_REMAINING for 999999
SQL> col comp for 999 heading "%Comp"
SQL> SELECT sid, MESSAGE, ELAPSED_SECONDS, TIME_REMAINING, round(sofar/totalwork*100) comp
FROM v$session_longops
WHERE opname LIKE 'RMAN%'
AND opname NOT LIKE '%aggregate%'
AND totalwork != 0
AND sofar <> totalwork;

Conclusion
In this article we have learnt the steps to roll forward a physical standby database using RMAN incremental backup.

Rebuild Physical Standby using RMAN full backup

Overview:
At times standby database can go out of Sync for many reasons like, accidentally deleting archive log on primary or RMAN backup deleted archive log before shipping to standby database server. When this happens you must rebuild the Standby database using primary database backup.

In this article we outline the process of rebuild the Physical Standby which is out of sync from Primary.

Environment Details

Hostname
Primary server :–
lnx-nsm-prod01/ lnx-nsm-prod02

Standby Server :– 
lnx-nsm-dr01/ lnx-nsm-dr02

Operating system
Linux
Database Environment
NSMDB and NSMDR

  •     Take full RMAN backup of primary. Create location if does not exists.

run {
allocate channel c1 device  type disk format '/backup/nsmdb/NSMDB_%U';
backup database plus archivelog tag=”FORSTDBY”;
}

  •       Take a control file backup from primary.
rman target /
backup current controlfile for standby format '/backup/nsmdb/NSMDB_stby_ctl';


  •       Copy backup pieces to standby server. Create location if does not exists on standby
  •       Stop and clean up standby Database files from locations
srvctl stop database –d nsmdr


  • Start the standby database instance in nomount and restore the controlfile.
rman target /                            
startup nomount
restore standby controlfile from '/backup/nsmdb/NSMDB_stby_ctl'


  •      Mount the standby database, stop MRP if it is up, catalog the backup pieces.
SQL> alter database mount standby database;
SQL> ALTER DATABASE RECOVER MANAGED STANDBY DATABASE CANCEL;
rman target /
catalog start with '/backup/nsmdb/NSMDB_%U';


  •      Now restore database.
run {
allocate channel c1 device  type disk format '/backup/nsmdb/NSMDB_%U';
restore database;
}
Exit;


  •         Need to shutdown the database.
SQL>  shutdown immediate;           


  •        Start the database in read only mode.
$ srvctl start database –d nsmdr      


  •        Restart MRP and ensure that recovery is progressing.
DGMGRL> edit database nsmdr set state=APPLY-ON;


Monitoring RMAN Progress

The below query can be used to monitor the progress of RMAN sessions performing backup/restore.

set lines 150
col MESSAGE for a100
col sid for 999999
col ELAPSED_SECONDS for 999999
col TIME_REMAINING for 999999
col comp for 999 heading "%Comp"
SELECT sid, MESSAGE, ELAPSED_SECONDS, TIME_REMAINING, round(sofar/totalwork*100) comp
FROM v$session_longops
WHERE opname LIKE 'RMAN%'
AND opname NOT LIKE '%aggregate%'
AND totalwork != 0
AND sofar <> totalwork;

Conclusion
In this article we have learnt the steps to rebuild a physical standby database which was out of sync from primary database.

Steps to Shutdown Exadata Database Machine

Overview
When you perform power maintenance, data center maintenance or moving servers from one data center to another you need to shutdown the Clusterware/Database/Servers. If you have Exadata Database Machines sitting in your data center then you need to shutdown it as well. The process of shutting down Exadata Database machine is slightly different when compared to servers or cluster. We should follow a sequence of steps to shutdown Exadata components. 

In this article, we will demonstrate the steps to shutdown Exadata Database Machine to carry out maintenance task.

Environment
Exadata X5-2 Full Rack


  • Log in to the first Exadata compute node as as root user.
  • Change to root home directory and create the following files

[root@dm01db01 ~]# cd /root

[root@dm01db01 ~]# vi dbs_group
dm01db01
dm01db02
dm01db03
dm01db04
dm01db05
dm01db06
dm01db07
dm01db08

[root@dm01db01 ~]# vi cell_group
dm01cel01
dm01cel02
dm01cel03
dm01cel04
dm01cel05
dm01cel06
dm01cel07
dm01cel08
dm01cel09
dm01cel10
dm01cel11
dm01cel12
dm01cel13
dm01cel14

  • Check if Grid Infrastructure is enabled for autostart:

[root@dm01db01 ~]# dcli -g dbs_group -l root /u01/app/11.2.0.4/grid/bin/crsctl config crs
dm01db01: CRS-4622: Oracle High Availability Services autostart is enabled.
dm01db02: CRS-4622: Oracle High Availability Services autostart is enabled.
dm01db03: CRS-4622: Oracle High Availability Services autostart is enabled.
dm01db04: CRS-4622: Oracle High Availability Services autostart is enabled.
dm01db05: CRS-4622: Oracle High Availability Services autostart is enabled.
dm01db06: CRS-4622: Oracle High Availability Services autostart is enabled.
dm01db07: CRS-4622: Oracle High Availability Services autostart is enabled.
dm01db08: CRS-4622: Oracle High Availability Services autostart is enabled.

  • Disable the Grid Infrastructure for autostart on the compute nodes if it is currently enabled for autostart.

[root@dm01db01 ~]# dcli -g dbs_group -l root /u01/app/11.2.0.4/grid/bin/crsctl disable crs
dm01db01: CRS-4621: Oracle High Availability Services autostart is disabled.
dm01db02: CRS-4621: Oracle High Availability Services autostart is disabled.
dm01db03: CRS-4621: Oracle High Availability Services autostart is disabled.
dm01db04: CRS-4621: Oracle High Availability Services autostart is disabled.
dm01db05: CRS-4621: Oracle High Availability Services autostart is disabled.
dm01db06: CRS-4621: Oracle High Availability Services autostart is disabled.
dm01db07: CRS-4621: Oracle High Availability Services autostart is disabled.
dm01db08: CRS-4621: Oracle High Availability Services autostart is disabled.

[root@dm01db01 ~]# dcli -g dbs_group -l root /u01/app/11.2.0.4/grid/bin/crsctl config crs
dm01db01: CRS-4621: Oracle High Availability Services autostart is disabled.
dm01db02: CRS-4621: Oracle High Availability Services autostart is disabled.
dm01db03: CRS-4621: Oracle High Availability Services autostart is disabled.
dm01db04: CRS-4621: Oracle High Availability Services autostart is disabled.
dm01db05: CRS-4621: Oracle High Availability Services autostart is disabled.
dm01db06: CRS-4621: Oracle High Availability Services autostart is disabled.
dm01db07: CRS-4621: Oracle High Availability Services autostart is disabled.
dm01db08: CRS-4621: Oracle High Availability Services autostart is disabled.

  • Shutdown the Grid Infrastructure stack on the Exadata compute nodes

This will take some time to come out
[root@dm01db01 ~]#dcli -g dbs_group -l root /u01/app/11.2.0.4/grid/bin/crsctl stop crs

[root@dm01db01 ~]# dcli -g dbs_group -l root /u01/app/11.2.0.4/grid/bin/crsctl check cluster
dm01db01: CRS-4639: Could not contact Oracle High Availability Services
dm01db01: CRS-4000: Command Check failed, or completed with errors.
dm01db02: CRS-4639: Could not contact Oracle High Availability Services
dm01db02: CRS-4000: Command Check failed, or completed with errors.
dm01db03: CRS-4639: Could not contact Oracle High Availability Services
dm01db03: CRS-4000: Command Check failed, or completed with errors.
dm01db04: CRS-4639: Could not contact Oracle High Availability Services
dm01db04: CRS-4000: Command Check failed, or completed with errors.
dm01db05: CRS-4639: Could not contact Oracle High Availability Services
dm01db05: CRS-4000: Command Check failed, or completed with errors.
dm01db06: CRS-4639: Could not contact Oracle High Availability Services
dm01db06: CRS-4000: Command Check failed, or completed with errors.
dm01db07: CRS-4639: Could not contact Oracle High Availability Services
dm01db07: CRS-4000: Command Check failed, or completed with errors.
dm01db08: CRS-4639: Could not contact Oracle High Availability Services
dm01db08: CRS-4000: Command Check failed, or completed with errors.

  • Ensure that the Grid Infrastructure stack has shutdown successfully on all the Compute nodes. 

The following command returns no output if the Grid Infrastructure is shutdown:

[root@dm01db01 ~]# dcli -g dbs_group -l root "ps -ef | grep diskmo[n]"

  • Disable email/SNMP alerts. The following command will show the current notification method:

[root@dm01db01 ~]# dcli -g cell_group -l root "cellcli -e list cell attributes name,notificationMethod"
dm01cel01: dm01cel01     none
dm01cel02: dm01cel02     none
dm01cel03: dm01cel03     none
dm01cel04: dm01cel04     none
dm01cel05: dm01cel05     none
dm01cel06: dm01cel06     none
dm01cel07: dm01cel07     none
dm01cel08: dm01cel08     none
dm01cel09: dm01cel09     none
dm01cel10: dm01cel10     none
dm01cel11: dm01cel11     none
dm01cel12: dm01cel12     none
dm01cel13: dm01cel13     none
dm01cel14: dm01cel14     none

  • Now set the notification method to null to disable alerts:

[root@dm01db01 ~]# dcli -g cell_group -l root "cellcli -e alter cell notificationMethod=none"
dm01cel01: Cell dm01cel01 successfully altered
dm01cel02: Cell dm01cel02 successfully altered
dm01cel03: Cell dm01cel03 successfully altered
dm01cel04: Cell dm01cel04 successfully altered
dm01cel05: Cell dm01cel05 successfully altered
dm01cel06: Cell dm01cel06 successfully altered
dm01cel07: Cell dm01cel07 successfully altered
dm01cel08: Cell dm01cel08 successfully altered
dm01cel09: Cell dm01cel09 successfully altered
dm01cel10: Cell dm01cel10 successfully altered
dm01cel11: Cell dm01cel11 successfully altered
dm01cel12: Cell dm01cel12 successfully altered
dm01cel13: Cell dm01cel13 successfully altered
dm01cel14: Cell dm01cel14 successfully altered

  • Shutdown cell services on all the cells:

[root@dm01db01 ~]# dcli -g cell_group -l root "cellcli -e alter cell shutdown services all"
dm01cel01:
dm01cel01: Stopping the RS, CELLSRV, and MS services...
dm01cel01: The SHUTDOWN of services was successful.
dm01cel02:
dm01cel02: Stopping the RS, CELLSRV, and MS services...
dm01cel02: The SHUTDOWN of services was successful.
dm01cel03:
dm01cel03: Stopping the RS, CELLSRV, and MS services...
dm01cel03: The SHUTDOWN of services was successful.
dm01cel04:
dm01cel04: Stopping the RS, CELLSRV, and MS services...
dm01cel04: The SHUTDOWN of services was successful.
dm01cel05:
dm01cel05: Stopping the RS, CELLSRV, and MS services...
dm01cel05: The SHUTDOWN of services was successful.
dm01cel06:
dm01cel06: Stopping the RS, CELLSRV, and MS services...
dm01cel06: The SHUTDOWN of services was successful.
dm01cel07:
dm01cel07: Stopping the RS, CELLSRV, and MS services...
dm01cel07: The SHUTDOWN of services was successful.
dm01cel08:
dm01cel08: Stopping the RS, CELLSRV, and MS services...
dm01cel08: The SHUTDOWN of services was successful.
dm01cel09:
dm01cel09: Stopping the RS, CELLSRV, and MS services...
dm01cel09: The SHUTDOWN of services was successful.
dm01cel10:
dm01cel10: Stopping the RS, CELLSRV, and MS services...
dm01cel10: The SHUTDOWN of services was successful.
dm01cel11:
dm01cel11: Stopping the RS, CELLSRV, and MS services...
dm01cel11: The SHUTDOWN of services was successful.
dm01cel12:
dm01cel12: Stopping the RS, CELLSRV, and MS services...
dm01cel12: The SHUTDOWN of services was successful.
dm01cel13:
dm01cel13: Stopping the RS, CELLSRV, and MS services...
dm01cel13: The SHUTDOWN of services was successful.
dm01cel14:
dm01cel14: Stopping the RS, CELLSRV, and MS services...
dm01cel14: The SHUTDOWN of services was successful.
[root@dm01db01 ~]#

  • Power off all storage cells:

[root@dm01db01 ~]# dcli -g cell_group -l root poweroff
or
[root@dm01db01 ~]# dcli -g cell_group -l root 'shutdown -h now'

  • Copy the /root/dbs_group to /root/dbs_group1:

[root@dm01db01 ~]# cp /root/dbs_group /root/dbs_group1

  • Remove the "first compute node name" from the /root/dbs_group1 file (using any editor, e.g. vi).

[root@dm01db01 ~]# vi /root/dbs_group1

[root@dm01db01 ~]# cat /root/dbs_group1
dm01db02
dm01db03
dm01db04
dm01db05
dm01db06
dm01db07
dm01db08

  • Power off all the compute nodes (except compute node # 1):

[root@dm01db01 ~]# dcli -g dbs_group1 -l root poweroff
or
[root@dm01db01 ~]# dcli -g dbs_group1 -l root 'shutdown -h now'

  • Power off the compute node #1:

[root@dm01db01 ~]# poweroff

Broadcast message from root@dm01db01.netsoftmate.com
        (/dev/pts/0) at 7:36 ...

The system is going down for power off NOW!

  • Exadata components are shutdown for maintenance.


Conclusion
In this article we have learnt how to Shutdown Exadata Database machine Rack for maintenance.

Comparing Oracle Database Appliance X8-2 Model Family

September 2019 Oracle announced Oracle Database Appliance X8-2 (Small, Medium and HA). ODA X8-2 comes with more computing resources com...