Wednesday, 29 November 2017

Boot Exadata Compute Node With Diagnostic Image Using ILOM Console Remotely

Introduction


Exadata Compute nodes and storage cells come with an Integrated Lights Out Manager or simply ILOM. ILOM is an adapter card in each compute node and storage cell that operates independently of the operating system. The ILOM boots up as soon as power is applied to the server and provides web and SSH access through the management network. Using ILOM you can perform several tasks remotely that would otherwise require physical access to the servers, this includes access to the remote console, attach diag.iso image, power server on and off, and rebooting or resetting the server. Also ILOM monitors the configuration and server internal hardware components.

In this article I will demonstrate step by step procedure on how to boot Exadata Compute node with the diagnostic ISO image using Web ILOM Remotely.

Steps to Mount diag.iso On An Exadata Compute Node Using ILOM Console:


  • Copy/Download diag.iso to desktop machine
You can copy the diag.iso image from a good working compute node or storage cell to the desktop as shown below. You have an option to download image file from MOS note as well. See the MOS note 2001454.1 for more details.

Locate the diag.iso image on a good working server


Using WinScp copy the diag.iso image to the desktop/laptop


  • Connect to the WEB ILOM as shown below
Open a web browser and enter the ILOM Hostname or ILOM IP address you want to attached diag.iso image


Enter the root user credentials


This is the ILOM home page which brief information about the server. On the left pane you have different options that you can use to manage the server remotely.


  • Launch Remote Console by following the steps below
On the left pane Expand "Remote Control" and Click on "Redirection"


Click on "Launch Remote Console" button


Click Ok


Click Ok


Click Continue


Click Run


Now we can access the server remotely.


  • Attach the diag.iso to Remote Console as follows
Click "KVMS" and Click on "Storage"


Click "Add" Button


Select the "diag.iso" image file on the local desktop/laptop


Click Ok


  • Reboot the Server to boot from ISO image as follows
On the left pane expand "Host Management", Click on "Host Control" and Select "CDROM" as Next Boot Device and Click Save button


On the left pane expand "Host Management", Click on "Power Control" and Select "Power Cycle" and Click Save button


Click Ok


  • Now the System is booting from diag.iso image

  • Perform the desired action
Enter 'e' to enter into interactive mode or
Enter 'r' to perform a system restore from NFS backup

At this stage the server booted from diag.iso, enter into interactive mode, restore/recovery the machine or correct the OS configuration that you have and when you are done, disable redirection.

Conclusion

In this article we have learned how to mount diag.iso on Exadata compute node and boot Exadata Compute node. Using ILOM you can perform several tasks remotely that would otherwise require physical access to the servers, this includes access to the console, power server on and off, and rebooting or resetting the server.

Saturday, 25 November 2017

Oracle Enterprise Manager Database Express 12c - EM Express


Introduction:


Oracle Database Console that existed in Oracle Database 10g and 11g is now dead in Oracle Database 12c. Oracle Database 12cR1 gave birth to a completely new GUI interface known as Oracle Enterprise Manager Database Express or simply EM Express. EM Express replaces the Database Console that existed in Oracle 10g and 11g.


Enterprise Manager Database Express is a lightweight browser-based tool for managing Oracle Database 12c is well suitable for common DBA tasks such as Tablespace Management, User Management and comprehensive performance diagnostics and tuning. You can't perform a lot of DBA activities using EM Express as you were able do it using Database Console.


EM Express is built inside the Oracle Database and uses internal infrastructure components, such as XDB and SQL*Net. The database must be open in order to use EM Express as EM Express is built inside the database. 


If you selected the option "Configure Enterprise Manager (EM) database express", the EM Express will be configured as part of the database creation process. Once the database is created, DBCA displays a success message with the EM Express URL. The default EM Export https port number is 5500.


Database Express is used to manage a single database and it is automatically installed when you create a database using DBCA.


The URL to connect to EM Express has the following format "https://<hostname>:5500/em" for Example, "https://dm01db01.netsoftmate.com:5500/em"


Important Note: 
  • EM Express cannot create a CDB 
  • EM Express can be configured at both root and PDB level, with each container using a different HTTP/HTTPS port
  • EM Express can view any PDB as if it were a standalone database (non-CDB)
  • EM Express cannot stop and start the database and listener
  • EM Express is RAC aware 
  • You can grant users read-only access so that they can view the UI but not make any changes
SQL> grant EM_EXPRESS_BASIC to <user>;
  • EM is supported on Enterprise Edition, Standard Edition and Express Edition
  • Diagnostic Pack and Tuning Pack features are not available in Standard Edition and Express Edition
  • Basic EM Express features are available free of cost
  • You need Diagnostic Pack and Tuning Pack license to use performance diagnostics and tuning features


In this article I will demonstrate how to connect to EM Express and use different EM Express features.


  • Connecting to EM Express

Enter the EM Express URL into the web browser and confirm the security warning. Here I am using Chrome for accessing EM Express.


https://dm01db01.netsoftmate.com:5500/em


Enter the credentials to login to the EM Express console.


This is the EM Express home page. We can see there are 4 different tabs that can be used for different purposes.


  • EM Express Tab

Let's look at the each Tab and the options available in each table.


Configuration Tab list the different parameters, database properties,  feature usage and Memory configuration


Storage Tab can be used for Tablespace Management, Undo, Redo Log & Archive Log Management and Control File Management


Under Security Tab you manage Users, Roles & Profiles


Performance Tab is the important tab that is used to Manage the Database Performance


To check base feature usage, navigate to Configuration Tab and click on Database Feature Usage. The below page shows all the database feature usage.


This is the Memory Management page


  • How to create a new tablespace using EM Express
Navigate to Configuration tab and click Tablespaces. Select Create Tablespace and follow the instructions below to create a new tablespace


Enter Name, select tablespace type, bigfile and status. Click Next


Check if you want to use OMF, Enter number of Datafiles, Size, Auto Extend, Increment and Max Size. Click Next


Select Block Size and Extent Allocation. Click Next


Choose the logging option. Click Next


Select space management and Compress type.


Click on on Show SQL if you want to capture the SQL statement so you can use it to create tablespaces manually. Click Ok to create tablespace


The confirmation screen show that he tablespace is create successfully


Verify the tablespace creation


Check all tablespace in the database


Performance Hub Page


Click on the activity tab to check the current database acitivty


Click on ADDM tab to check the ADDM recommendation


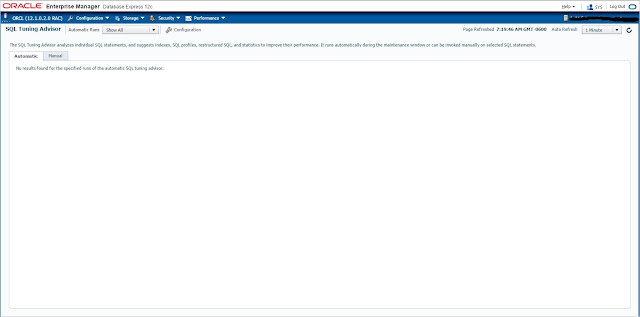
Click on SQL Tuning Advisor under Performance tab


Enable Automatic SQL Tuning Advisor


Request being processed


Click ok to complete


User page displaying all the database users. You can also create a new user using the Create User button on the page.


Conclusion


In this article we have learned about Oracle Enterprise Manager Database Express 12c or simply EM Express. EM Express replaced the Database console that was existed in Oracle database 10g and 11g. It is a lightweight browser-based tool for managing Oracle Database 12c is well suitable for common DBA tasks.


Comparing Oracle Database Appliance X8-2 Model Family

September 2019 Oracle announced Oracle Database Appliance X8-2 (Small, Medium and HA). ODA X8-2 comes with more computing resources com...